Previous | Next
Achieve Accessibility with Dreamweaver
By Virginia DeBolt
Making Forms Accessible with Dreamweaver
Dreamweaver uses this icon (with abc on it) for the label attribute. Just to the right of it is the fieldset icon.

Making a form accessible involves:
- label the form fields
- use sensible tab order controls if they are needed
- use
fieldset elements with legends to group related form elements
- use a submit button to submit the form (not JavaScript)
If you have set to use "Accessibility for Form Objects", Dreamweaver will automatically present the label options when inserting a form element.
CSS Layouts and Label Elements
If you use CSS for layout, all you need to do is wrap the label.
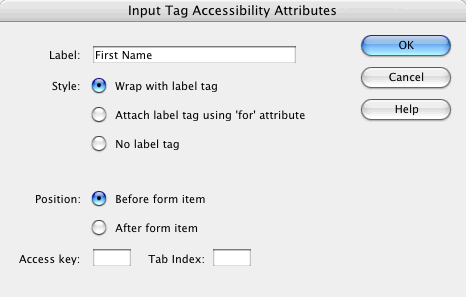
Use the to name the element “fname.” The resulting code should be:
 <label>First Name

<input name="fname" type="text" id="fname" />

</label>
The label associates the form element with the appropriate text. Any assistive device (e.g., Jaws, Home Page Reader)
will understand this association.
Table Layouts and Label Elements
If the form is laid out in a table, with the label and the form element in two different table cells, then you need the form attribute with an id on the form element. For an assistive device to make the connection between text in one table cell and a form element in another table cell, you must help out by telling which element (identified with an id) the text is for.
Dreamweaver only does part of this for you.
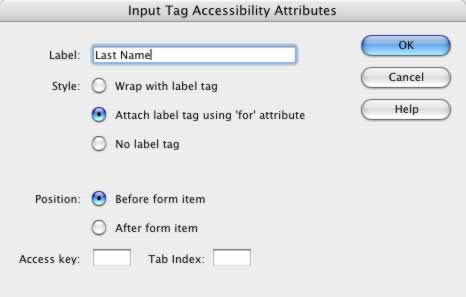
If you select “Attach label tag using 'for' attribute” you get the for attribute inserted along with an id attribute, but the naming is so generic it isn't helpful. Since a named id must be unique on the page, you have to do some tweaking to the names to make it useful.
You get this code:
 <label for="textfield">Last Name</label>

<input type="text" name="textfield" id="textfield" />
You can change the id to something more appropriate in the Property Inspector. Here the element is given the id “lname.”
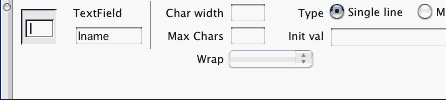
However, the value of the id and the value of the for must match. To change the value of the for attribute, you must go into Code View and type the value you want for the for attribute.

The resulting code is:
<label for="lname">Last Name</label>

<input type="text" name="lname" id="lname" />
The value of for and id must match. The value of name does not have to match.
Tab Order
The dialog box for accessible form elements includes an option to change the tab index value. Try tabbing through your form to be sure the tab order is logical and adjust the tab index values if needed.
Group Form Controls
Related form elements can be grouped using a fieldset. Select the set of form elements you want to include in the fieldset. Click the fieldset icon and a dialog asking for the legend opens.
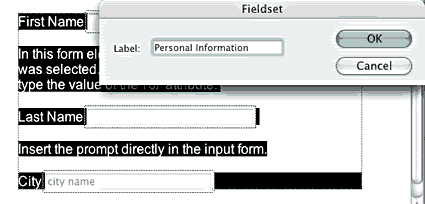
Note that the dialog box says “Label,” but in fact, the element you type here is the legend. However
since, label, fieldset and legend can all be
styled with CSS; this dialog field could be better named.
Prompts
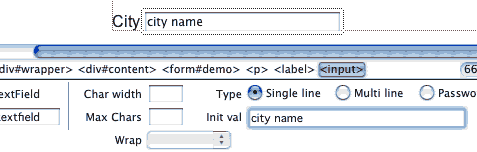
If a prompt such as “Type search words here” or “City Name” is needed, it can be entered directly in the input element using the Init val field on the Property Inspector.
Submit
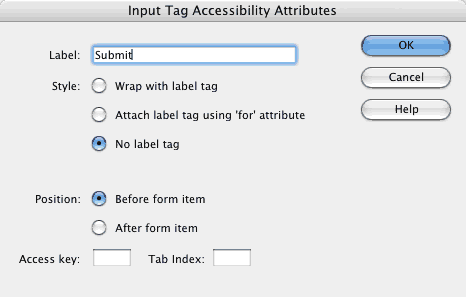
Make sure the form is submitted with a form control button, not merely by JavaScript. Because the form label is on the button, no label is needed.
Resources
Previous | Next
|